Session Timeline
Session Timeline provides a detailed guide of events that occurred in your application leading up to an issue. It helps you understand what happened before a crash or error, making it easier to reproduce and debug problems in production.
What Session Timeline Captures
By default, Session Timeline tracks a variety of activities:
- App lifecycle events – when the app starts, pauses, resumes, changes views, or terminates
- Connectivity status – detects when the device goes offline or comes back online
- Events – custom actions or tracked operations performed within the app
- Errors – non-fatal and fatal issues that help explain unusual behavior
Viewing the Session Timeline
The session timeline is automatically attached to each reported event. In your monitoring dashboard, you can explore the session details, including all recorded actions and system events, in chronological order. This makes it easier to understand the sequence of events that led up to a crash or error.
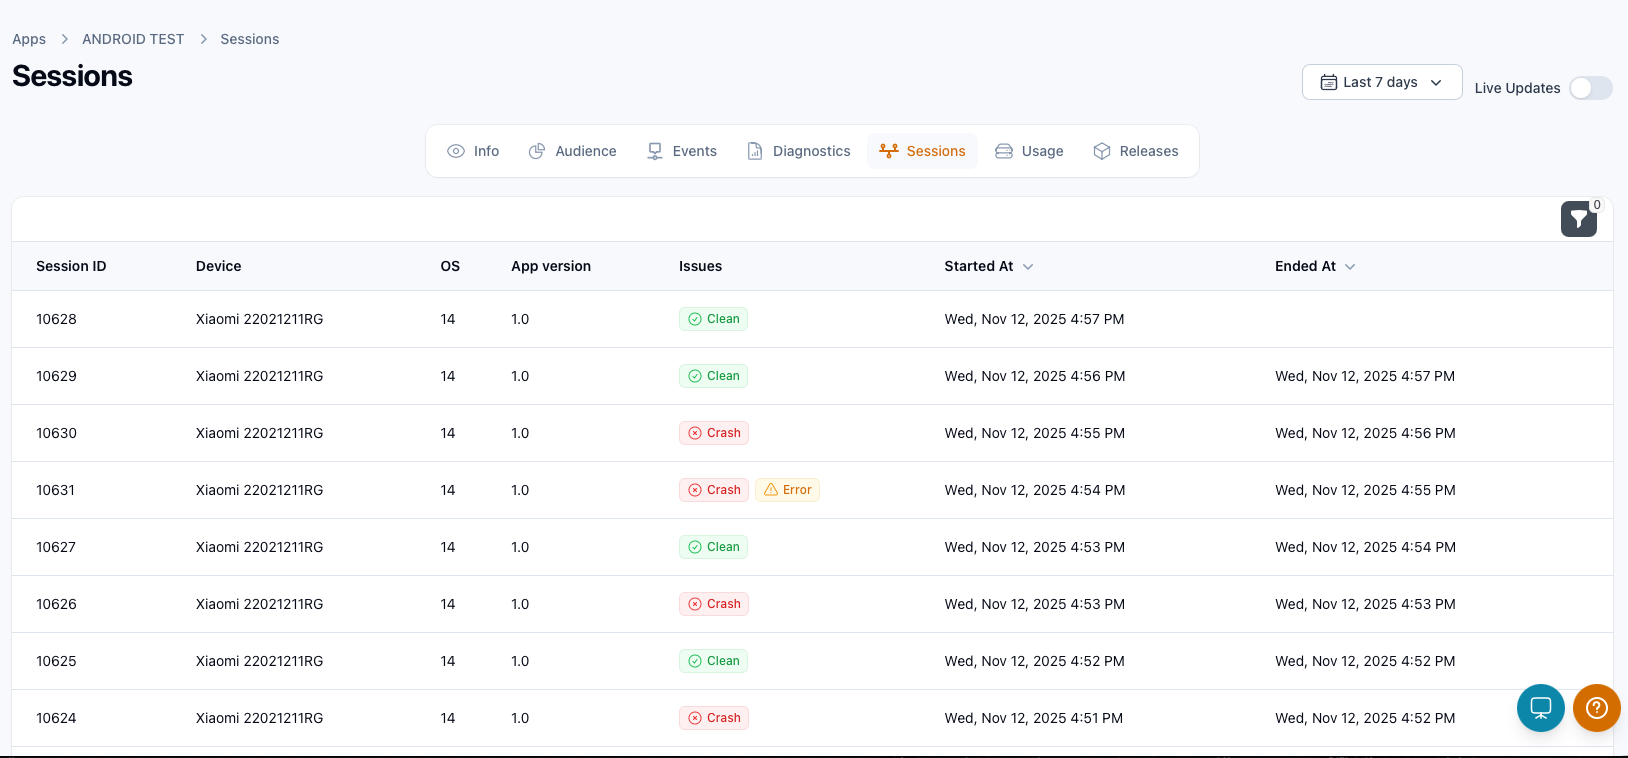
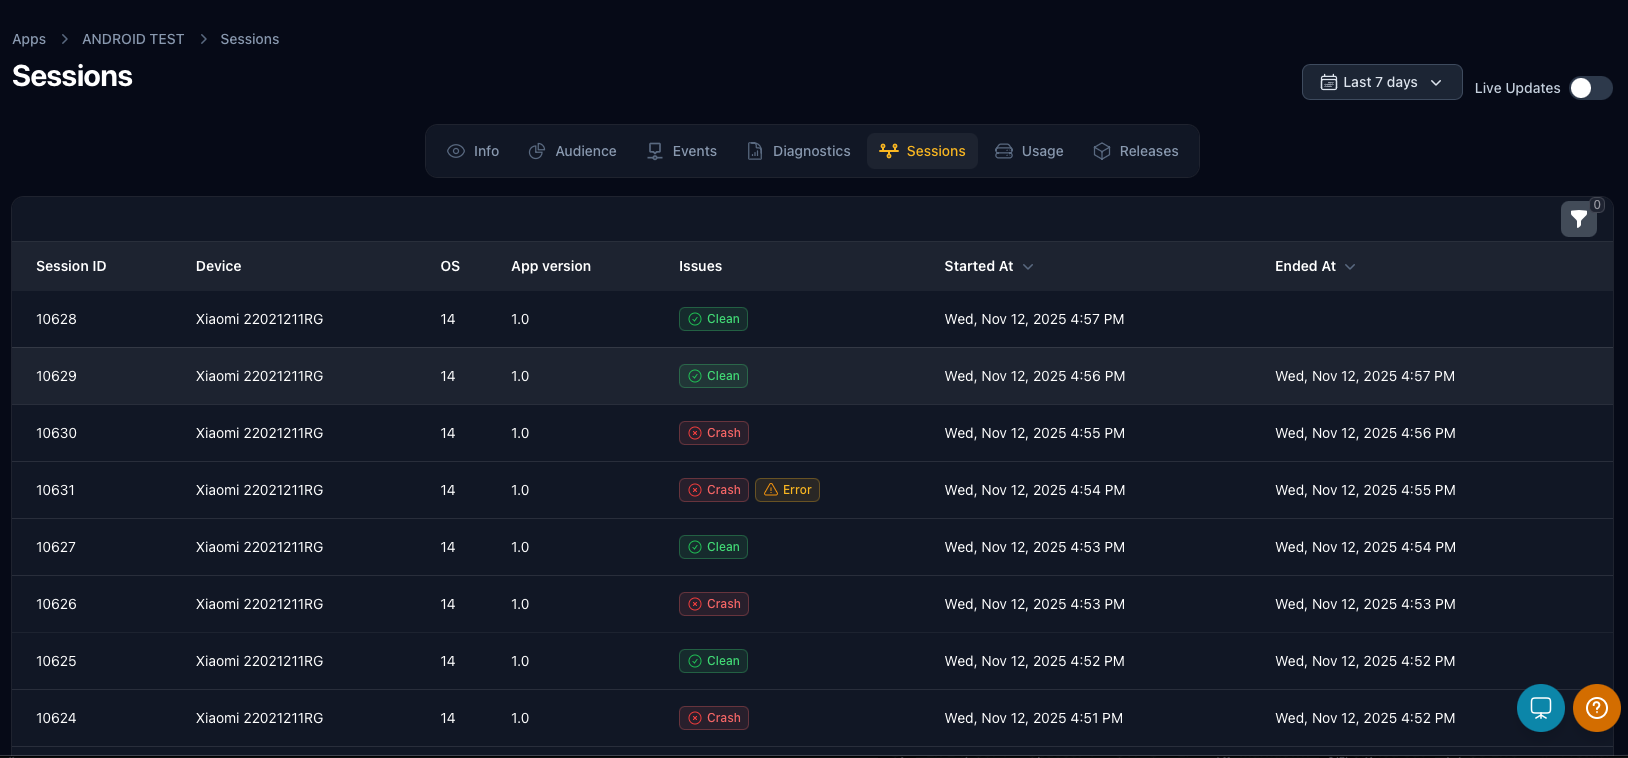
Dashboard Trail
Info
Each session represents a continuous period of user activity within your application. During a session, Session Timeline automatically records key information.
Detailed Trail
Info
The detailed view provides a complete visualization of the user session, combining general session information with a chronological sequence of recorded actions.
Information panel
The information panel summarizes key session details, including:
- Device – the model or identifier of the user's device
- OS – the operating system version the app was running on
- Started / Ended – timestamps showing when the session began and when it ended (or if it's still active)
- Duration – total length of the session
These details help correlate app behavior with specific devices, environments, and session lengths.
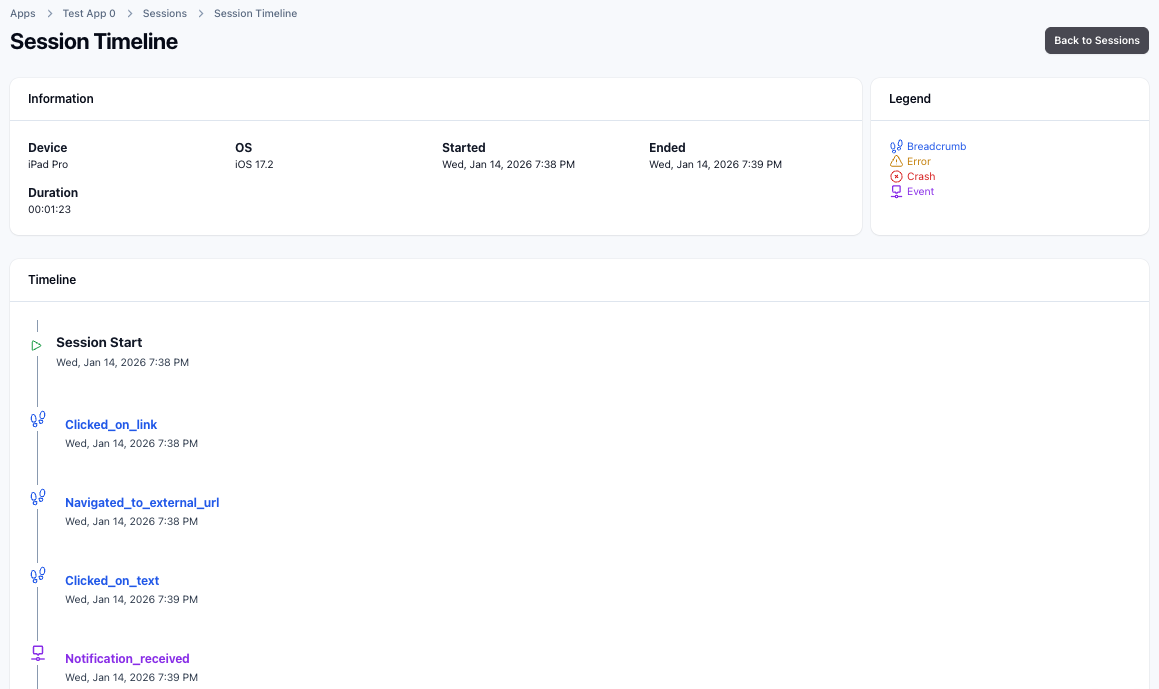
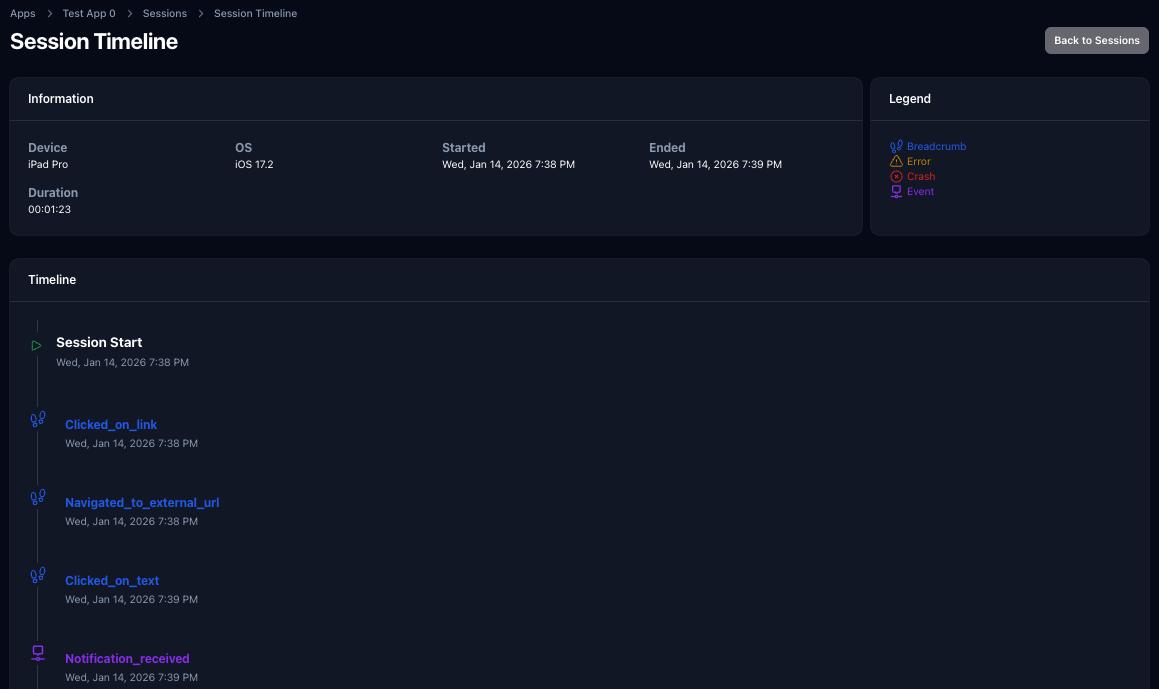
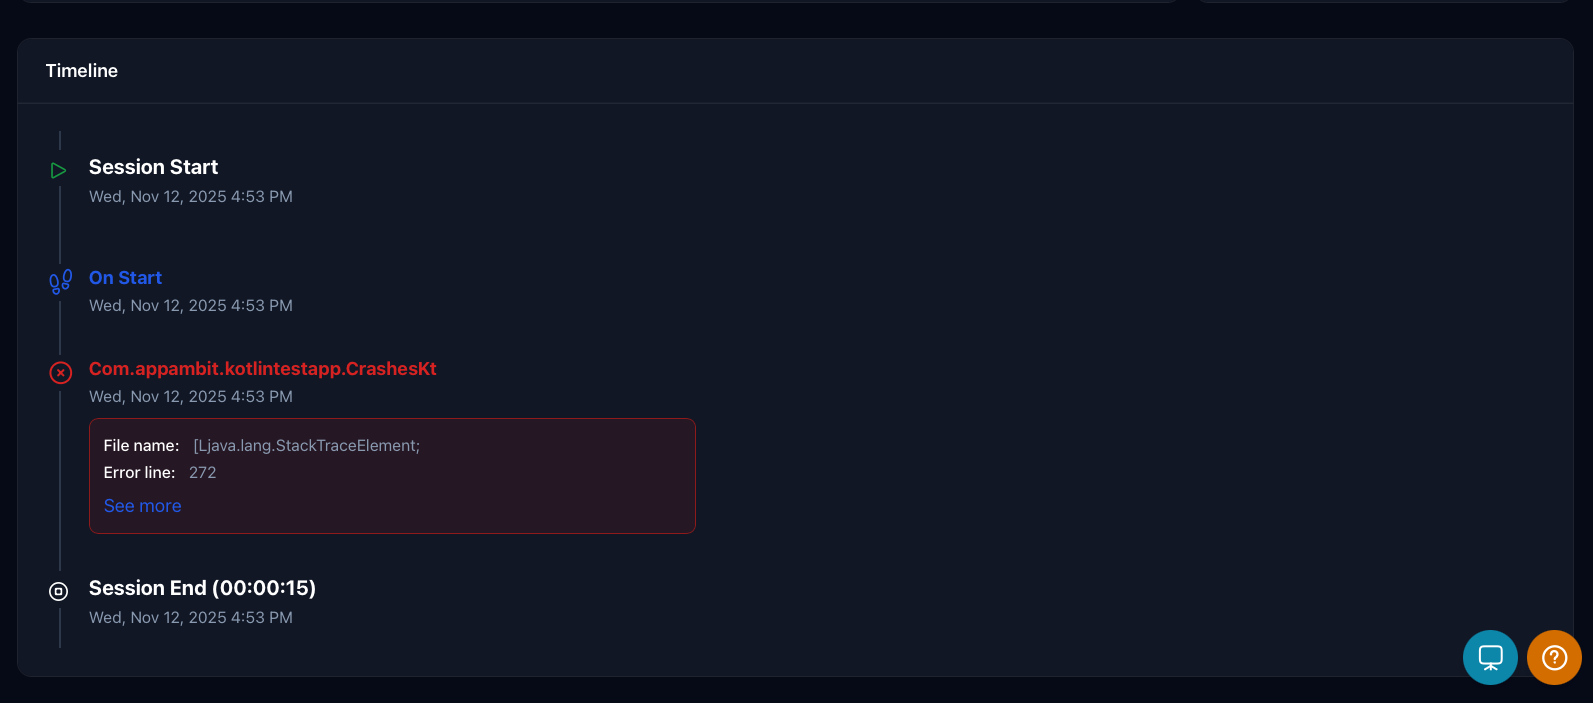
Timeline
Info
Below the panels, the timeline displays every action in chronological order, showing when each occurred relative to the session start. This view makes it easy to trace the exact flow of app activity and understand what led up to a specific issue or crash.

[ Hybrid platforms ]
The SDK automatically captures navigation breadcrumbs by integrating with each platform’s navigation system. Once registered, it listens for route state changes and records screen transitions as breadcrumbs without any manual instrumentation.
Info
This setup is required only for hybrid platforms (such as React Native and Flutter). Native platforms handle navigation tracking automatically and do not require this configuration.
Set up
import { registerNavigationTracking } from "appambit";
import { NavigationContainer, useNavigationContainerRef } from "@react-navigation/native";

function App = () => {
    const navigationRef = useNavigationContainerRef();
    return (
      <NavigationContainer
        ref={navigationRef}
        onReady={() => {
            registerNavigationTracking(navigationRef);
        }}>
        {/* Stack */}
      </NavigationContainer>
    );
};
import 'package:flutter/material.dart';
import 'package:appambit_sdk_flutter/appambit_sdk_flutter.dart';

MaterialApp(
  navigatorObservers: [
    AppAmbitSdk(),
  ],
  // other parameters
)
Each navigation event is recorded as a breadcrumb with the corresponding route name.
Navigation route naming
To keep breadcrumbs clear and meaningful, always define a route name for your screens.
import { type NativeStackScreenProps } from "@react-navigation/native-stack";

type RootStackParamList = {
HomeScreen: undefined;
SecondScreen: undefined;
};

type Props = NativeStackScreenProps<RootStackParamList, "SecondScreen">;

export default function SecondScreen({ navigation }: Props) {
return (
    <Pressable
        title="Back to Analytics"
        onPress={() => navigation.navigate("HomeScreen")}
    />
);
}
Navigator.push(
    context,
    MaterialPageRoute(
    settings: const RouteSettings(name: 'new_screen'),
    builder: (context) => const NewScreen(),
    ),
);
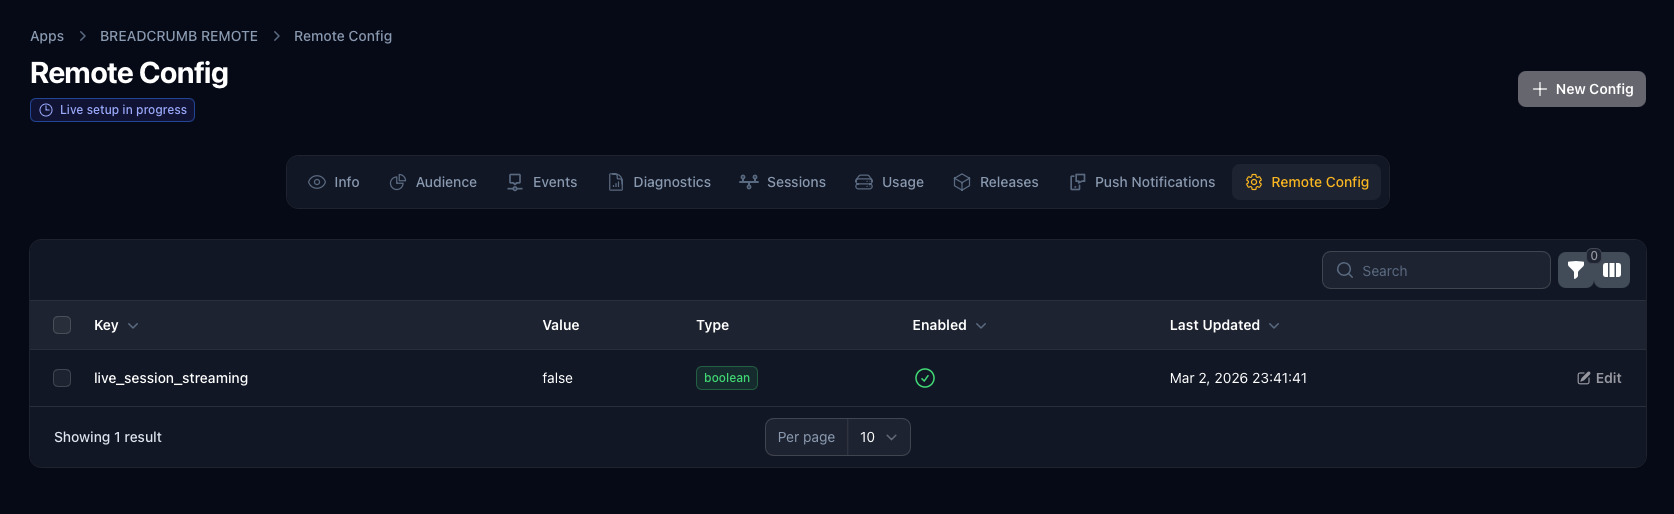
Enabling or Disabling Session Timeline
Session Timeline is enabled by default, but you can control its behavior through the dashboard settings under the "Remote Config" section. Here, you can choose to disable Session Timeline for all the sessions or adjust specific parameters to suit your needs.
The parameter to disable Session Timeline is live_session_streaming.
Set it to false to turn off Session Timeline for all sessions and capture just the session timeline when a crash occurs, or keep it true to continue capturing session details.